Friday, October 26, 2012

Living Life

The smell and taste of hot coffee in the morning is one of life's sweetest pleasures for me. I find it to be an immensely soothing way to start my day.

Setting up a beverage station was a guilty pleasure that my heart desired for a very long time. The idea of corralling everything into one place for easy access was very appealing. I just didn't know exactly what I wanted to do until I saw THIS. While you're there, I recommend that you check out her other videos. Nikki definitely has great decorating sense and style.

I am using The Brisbur Cabinet from Pier 1 as my beverage station. I have been on a hunt for a cabinet or table (or even a dresser as I was getting pretty desperate) for quite a while, until I came across this beautiful piece. It is both elegant and functional and fit my needs to a tee. It's height, width, and length was the perfect size for the little corner space in our dining area.


I am currently using a sheet of plexiglass to protect the top surface of the cabinet. It makes clean-up very easy and removes any fear of causing damage to the wood.


There are three drawers in the upper part of the cabinet where I keep Vue Packs, creamers, and sweeteners. I love how easy everything is to access.


There are shelves in the bottom of the cabinet where additional supplies are being kept. The brown canvas bins were purchased at Target. They have a hard inner core, are very sturdy, and I am very pleased with them.


My goal is to keep the surface of the beverage center as uncluttered as possible. There you will find the Keurig Vue (adore this machine), mugs on a mug tree, a container of snacks (for a quick grab and go), a small trash can, and a towel for quick wipe ups.

You wouldn't believe how difficult it was to find a mug tree. I was so happy when I finally found one (almost threw a party) at Bed Bath & Beyond. I am certain that it is because mug trees are kind of passe, clearly out of vogue, and while I'm at it, probably oh so 70's too. Blah!


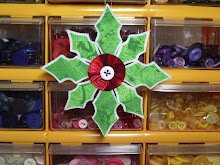
The wall hanging is actually a photo holder. There are small coils in the backs of each of the leaves that you can place pictures into. The coils act as veins in the leaves when viewed from the front. I probably will not be using it for pictures, instead, will opt for a cleaner, less cluttered look. This was also purchased at Pier 1.


Many of you have probably wondered about the meaning of mousechirpy at the beginning of my blog address. It is a combination of our pets names. This past year has been a very sad one for us due to the loss of both of our pets.

We lost Chirpy, our love bird, this past November. He was old and lived a long life. After having him for so long, I could usually understand the differences in his chirping and what they meant. The one that I miss the most is the sound of his chirp (actually, more like a screech) when he saw me for the first time each morning and knew that he'd soon be getting fresh bird seed. He expected so little, but gave us so much.


Mouse passed away in March of this year. I still cry for him, like I am doing as I'm typing this. He was my boy and I miss him dearly. For those that don't know, he suffered with a kidney problem for several years. His treatments were very stressful and took a tole on my spirit. He, too, lived a long life and was usually by my side in the craft room almost every day. My craft room is still filled with his presence. I find it both comforting and sad at the same time.


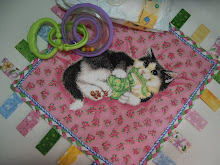
A few months before Mouse's passing, this bright eyed, bushy-tailed little bundle of energy came into our lives. He belongs to my son and his girlfriend.

This is Marlee, a dappled mini Dachshund, who has taken over the reigns as keeper and protector of our castle. He keeps us all on our toes, and has brought so much joy to our home.


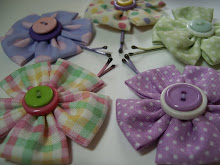
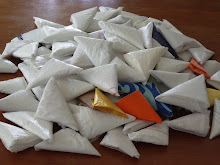
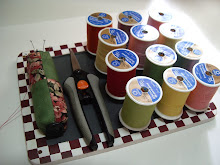
I haven't been sewing very much of anything lately. My poor sewing machine is slowly growing cobwebs. What I have been doing is making handmade mini albums and journals and that has been keeping me quite busy.

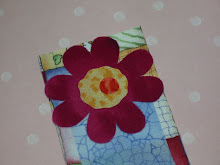
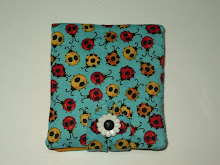
This is the cover of me and my hubby's album. Once completed, it will reflect a progression of our lives from past to present.


A 1/2-inch margin along the spine between each page allows this album to accommodate bulky embellishments without distorting the pages. It will end up being quite a thick album.


I chose to do some over-the-top embellishing on this album as my usual style is pretty simple. I think that I have achieved this goal because this album is as gaudy as I will ever allow myself to create.


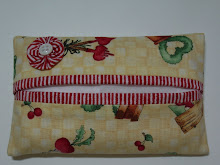
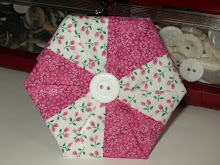
I have also learned that creating a handmade December daily journal is a fun concept, and one that I will be repeating again this year. This is the front cover of last years journal.


There is a lot of work involved in chronicling a full month, but it is very rewarding at the same time. It was fun bringing it out this year and looking back at the day-to-day, somewhat mundane things that we did.


Although it is a very time consuming thing to take pictures every day and then journal about it, I wholeheartedly recommend it.


I hope that all is well with each and every one of you. I apologize that I haven't been around to man this blog and I am very sorry for being so out of touch. Unfortunately, it takes motivation and commitment to run a blog and sadly, I seem to lack both of those things at this time. At this point, I am uncertain about what the future holds for Polka Dot Pineapple.

Over the past year, by choice, my life has slowed down quite a bit. I have grown to enjoy it that way. I chuckle at the thought that the only quandary that may possibly exist in my day is whether to have Italian or French Roast coffee in the morning, and then, what to have for dinner in the evening.

At this juncture, my life feels complete the way it is. I have been keeping busy in my home, doing things for myself and for my family. It is really amazing how acutely aware you become when you have the time to slow down and tune in to all that surrounds you. I hear and see things that I never did before and I appreciate everything so much more too. I am enjoying life and I wish the same for you too.
Take care!
Aloha,

Wednesday, October 5, 2011

Desktop Picture Holder

Hello everyone! I am sorry that I haven't been around lately. The longer that I stayed away from my blog, the easier it was to stay away from my blog, if you know what I mean. At this point, I am not sure how often I will be posting as I haven't been working on any new projects. I would like to thank you all for your comments and emails over the past several months. I literally have thousands of emails of all kinds to sort through and it is going to take me a while. I haven't been spending much time at all on the computer and I'm afraid it is going to be that way for a long while to come.

I am in the midst of cleaning and sorting through all of my craft stuff. A large portion of it has already been donated. The one thing that I cannot wrap my mind around is how much fabric I have accumulated over the years. Finding storage for it has become a real problem. I hope to live long enough to use it all and I certainly will give it my best try. For now and possibly forever, I am on a self imposed fabric buying diet.

All kinds of foolishness has been going on in my life but I won't bore you with the details. My family is intact and functioning well just in case you were wondering. In between it all, I have been working hard on getting my entire house in order, digging through decades of stuff, brutally tossing, organizing, and just trying to create a well functioning home once again.

The following is the original project that I put together for the I Am Roses contest back in May of this year. After much thought, I decided not to enter the desktop picture holder because of it's simplicity and entered my ring box instead. These pictures have been sitting in my computer since that time. Because I haven't been crafting at all over the last four months, I thought that I'd share them with you today.


For this project, you will need several mulberry paper leaves and roses, A Versamark Watermark Inkpad, glittered embossing powder and heat gun, gold 28 gauge wire, assorted small beads, a 1/4-inch paper punch, acrylic paint and paint brush, gold foiling paint or gold acrylic paint, a small flower pot, a small weight to weigh down the flower pot, small piece of styrofoam, cardboard, and cardstock, and a hot glue gun.

To begin, dip random parts of the mulberry leaves into a Versamark Watermark Inkpad.


Dip the leaves into the embossing powder.


Dip the tips of the rose petals into the ink pad.


Dip the roses into embossing powder. Use your heat gun to heat emboss.


I used a gold foiling pen to color the flower stems as they were originally green in color.


Using a length of wire anywhere between 2-1/2 to 4 inches, poke one end into the base of the flower alongside the existing stem.


Twist both wires together. The additional wire will lend more support to the rose stem.


To make the picture hanger, take a piece of wire about 5-1/2-inches and bend the upper third into a 90 degree angle.


Curl the short end of the wire into a swirl.


The wires used in this project measured anywhere from 5 to 8 inches. Add a bead to the center of a piece of wire.


Twist the wire tightly to secure the bead.


Create a flower and leaf cluster by twisting a couple of leaves around each of the roses.


Cut a piece of styrofoam that will fit snugly inside the pot. Cut a round piece of cardboard that will fit on top of the styrofoam (to hide the ugly styrofoam). Choose a weight of some kind to give some heaviness to the pot to keep it from tipping over(small rocks are good). You can use whatever small, weighty item you have laying around the house.


Paint the outside and a small portion of the inside of the pot with acrylic paint.
Glue the weight to the bottom of the pot using a hot glue gun.


Decorate the outside of the flower pot. I've chosen to keep it simple with just woven ribbon glued to the outside rim.


Cut a circle from cardstock using the cardboard circle as a template. Glue the cardstock to one side of the cardboard circle. Punch a hole in the center using a paper punch. Glue the cardboard side of the circle onto the styrofoam.


Gather all of the stems together, taking care to stagger the height of the flowers and beads while at the same time, arranging it in a pleasing manner. Glue the stems into the hole.


Here is a closeup of the flowers. They remind me of porcelain flowers. Well, sort of.


Here is the completed project.


The ring box and the desk top picture holder complement each other nicely.


I hope that you enjoyed this project. Until we meet again, take care, my friends!

Aloha,

Monday, May 30, 2011

I Am Roses Creative Contest Entry

Hi everyone! I thought that I would share my I Am Roses "In the Garden" contest entry with you. The contest is being sponsored by I Am Roses, a company that sells gorgeous mulberry flowers.

Please click on the video to watch. Oh, and if you have a YouTube account, please leave a comment over there. This is my first YouTube video so please be gentle. Can you tell that I was scared out of my mind recording this? I’m looking forward to hearing from you!


I don’t do product reviews or hauls very often unless it is for something that I am super excited about and/or I believe may be of some interest to you. I recently received my order from I Am Roses after watching haul after haul video on YouTube about these amazing mulberry paper flowers. As you all know, flowers are my weakness so I finally caved in and bought me some.

I just have to say that I am truly blown away at how amazingly beautiful and detailed they are and how much I love working with them.


Bunma, the owner of I Am Roses, offers excellent and personal customer service. Her prices are extremely economical and are far better than I could ever find in my stores.

It is evident that extra effort was made to ensure that I received the product in perfect condition.


I Am Roses is a company based in Thailand. I am in Hawaii and received my package in well under 2 weeks. If you would like to enjoy these flowers too, you can find her website HERE.

A HUGE thank you goes out to my son, Evan, who helped me make this video. You are the cat's meow, kiddo!

Take care, everyone!

**Music: Kevin MacLeod of Incompetech Royalty Free Music

**Victorian image courtesy of Magic Moonlight Free Images

Aloha!

Tuesday, April 26, 2011

Altered Dress Form

Over the last couple of years I have been watching the altered dress form craze from a distance, always wanting to try my hand at it, but never really diving in. Well, I am happy to say that I have recently changed that. The creation of this dress form was an ad-lib project put together on a whim late one Sunday afternoon.


The dress form is hand drawn and cut from chipboard. The trunk is painted in a soft muted shade of peach and a rich chocolate was added to the base.


A big thank you goes out to Valita of Valita’s Designs and Fresh Folds for providing the bosomy bodice tutorial and also for providing the inspiration for this project. You can find the bodice directions HERE along with many of her inspirational designs. This gal is a creative genius and I am certain that you will agree. Thank you again, Valita!

The fabric that I used for the extra full bouffant skirt is called Peacock Collage and is from a line named Proud by Keri Beyer for In the Beginning Fabrics. I have been holding onto this fabric for quite a while, hoarding it like a crazed fabric junkie and afraid to cut into it because I love it so. Beneath the skirt is a flouncy tulle crinoline in a medium shade of mango.


The addition of miniature paper flowers, ribbon, and rhinestones provided the perfect finishing touches.


I hope that you enjoyed seeing my version of an altered dress form.

Take care!

Aloha!

Thursday, April 14, 2011

Carrot Patch Money Holder

I am always looking for fun and unique ways to give the gift of money, especially when the recipient is a young person. Since this gift will be for a 2-year old, I knew that it would be destroyed as soon as she put her hands on it. Because of the outcome, I knew that I wouldn't be spending enormous amounts of time and energy on it. At the same time, I wanted it to be cute and something that I felt good giving away.


I designed the Carrot Patch Money Holder to fit a single, tightly rolled U.S. dollar bill. I know that there are templates for carrot boxes out there but I didn't want to search for one and then have to manipulate the pattern to fit my needs. The rule that I set for myself was that it had to be super simple to make without using an actual pattern.

I found that an 8-1/2-inch salad plate was the perfect template needed for this project. Trace the template onto patterned cardstock and cut out the circle.

Cut the circle into 4 equal pie-shaped pieces. Each circle will make 4 carrots.


Make a 1/4-inch cut into the pointed end of the triangle. Trim 1/4-inch off of one side of the triangle (just eyeball it). You should get what resembles a lopsided fan.


Take the side that has been trimmed and bring it over to the opposite end, leaving a 1/4-inch margin. Crease the fold sharply. (The margin will eventually become a tab which will be used to close the box.)


Fold over again and crease the fold sharply.


Trim the pointed end of the tab at a slant.


Form a crease in the 1/4-inch margin to create a tab which will eventually be used to hold the carrot together in a cone shape.


Mark 1-inch from the top of the triangle on both sides.


Trim both sides of the triangle using the 1-inch marking as a guide. (Again, just eyeball it.)


Fold the top down using the 1-inch mark on either side as a guide. Crease well and unfold the entire triangle.


Add glue to the right side of the tab and glue the tab to the inside of the box.


Add a tightly rolled up dollar bill tied with ribbon to the inside of the money holder. Glue or tape the flaps closed.


To create the carrot leaves:

You will need a 1-3/4-inch by 1-3/4-inch piece of cardstock and a 3/8-inch by 8-1/2-inch strip of paper. Run the square piece of paper through a paper crimper if you desire.


Cut thin strips into the 1-3/4-inch square to create fringe. Be sure to leave approximately 1/4-inch at the base uncut. Glue the strip to the uncut side of the fringe approximately 1/4-inch from the edge.


Begin rolling with a quilling tool or a skewer at the base of the 1-3/4-inch square and ending at the end of the strip. Glue in place.


Glue the leaves onto a 1-inch paper scallop.


Glue the unit to the top of the box.


Make one or make more. I happen to think that a grouping of multi-patterned carrots look cute together.


The carrots were tucked into a paper basket along with some wispy paper shred. I'm sure that many of you will remember these woven paper baskets from your elementary school days. Embellish the basket with a cluster of pretty flowers for a fun Spring look.


Despite the lengthy instructions, this is super simple to create. Once I had the pattern configured, I was able to complete 8 carrots in about 45 minutes. I hope you give it a try!

Happy Easter, everyone!