Friday, January 30, 2009

Tutorial---Tea Tote

**This tutorial is intended for personal use only.**


The long awaited Tea Tote Tutorial is finally here! This was a request from last year. Sorry for the wait and thank you for your patience.
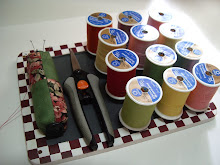
Pattern:


I recommend that you use 2 coordinating fabrics for this project. Cut the fabric to the sizes indicated on the pattern.
Cut the outside and tab from one fabric, and the lining and pockets from the other.


For the tab:

With an iron, press tab in half lengthwise, wrong sides together.


Open the pressed tab exposing the newly made crease. Bring both ends up to the crease. Press in place.


Bring both pressed edges together, press flat. It should look like a piece of bias tape.


Sew opening closed.


At the half way point, fold one side up creating a 90 degree angle. Press in place.


Fold the other side up to match. Press in place.


Sew across tab, approximately 3/8" from the point. This will secure the tab and keep it from opening up.


The completed tab.


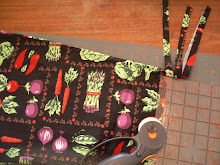
Lay the outside fabric piece onto a flat surface with the right side facing up. Place the tab in the center along one of the 3-1/2" sides, with the wrong side of the tab facing up. Pin in place.


Sew tab in place.


For all 4 pockets:
Fold in half. (Bring both 3-1/2" sides together) Press.


For the lining:
Place right sides together. Pin in place on one of the 3-1/2" sides.


Sew the lining together using a 1/4" seam, leaving 1-1/2" open in the center for turning.


Press seam open.


Putting the tote together:

Place the outside piece onto a flat surface, right side facing up.


Place the short pocket pieces on each end with the folded edge facing toward the center.


Top with the long pocket, folded edge also facing toward the center.


Place the lining on top of the pockets with the wrong side facing up. Pin all layers together.


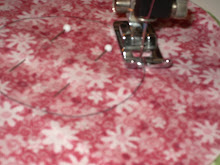
Sew completely around all 4 sides using a 1/4" seam.


Clip corners, turn right side out through the opening in the lining.


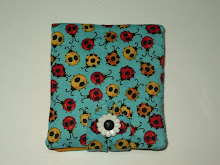
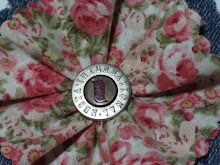
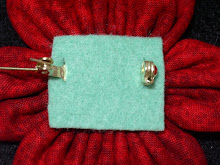
By hand, sew the opening in the lining closed. Sew on a button to the outside approximately 1/2" from the edge on the opposite side of the tab.


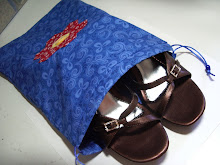
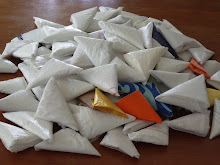
Fill the tote with tea and sweetener packets.


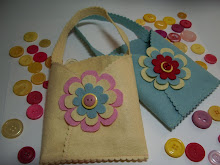
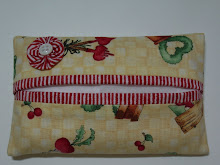
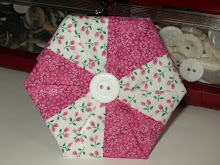
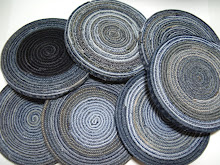
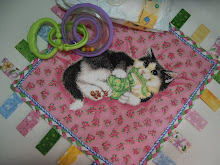
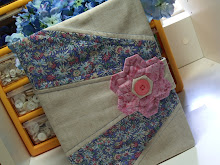
The completed Tea Tote.


Make a Tea Tote for all of the tea drinkers in your family. I know that they'll love and appreciate it as much as I do.

Aloha!

Tuesday, January 27, 2009

Tutorial--Heart to Heart Valentine Tufted Pin

**This tutorial is intended for personal use only.**

This is a very simple Valentines pin that can be put together in less than an hour. Change the fabrics to pastels and this could be your Easter or Spring pin. How about Christmas themed fabrics to dress up a holiday party outfit. The possibilities are only limited to your imagination.

To make this pin, you will need a needle, thread, embroidery floss, 3 coordinating fabrics, cardboard for pattern, polyester fiberfil, felt, a small button, a pin back, and a hot glue gun.

For the petals:
Cut a 3-1/2" circle from cardboard. Trace the petal pattern 3 times onto the wrong side of both coordinating fabrics. With your scissor, cut out the 6 petals.

For the flower center:
Cut a 1-3/4" circle from cardboard. Trace once onto your fabric of choice. With your scissor, cut out the circle.


To create the cardboard flower center base:

1) Cut a 1" circle from cardboard.
2) With a ruler and a pencil, draw 6 even pie-shaped pieces onto the circle.
3) With your scissor, cut a small notch where the 6 lines meet the outer edge of the circle.
4) Trim the pointy edges of the notch to form a smooth petal shape.
5) With a 1/8" paper punch, punch a hole into the center of the flower base.


Here are the components you will need to create the flower.


Take the first 3-1/4" circle, fold it in half and lightly finger press.


Fold in half again and lightly finger press.


With needle and thread, take a running stitch along the curved edge of each petal, alternating between each of your coordinating fabrics as you go along.


After all 6 petals are on the thread, clip the thread to release the needle.


Tie both ends of the thread together to form a circle of petals. Clip thread close to knot. Set piece aside.


For the flower center:

With needle and thread, take a running stitch around the perimeter of the 1-3/4" circle.


With wrong side of fabric facing up, place a tiny bit of fiberfil into the center of the circle.


Press the cardboard flower center base on top of the fiberfil and draw the fabric tightly around it, trapping both the fiberfil and the cardboard base inside. Tie off with a secure knot. Cut the thread close to the knot.


Thread 3 strands of embroidery floss onto a needle. Tie a knot on one end. Bring the needle up through the hole in the cardboard base and straight through the center.


Bring your needle around to the back and up through the hole once again. With your finger, feel for one of the notches and make sure that the embroidery thread falls into the groove. Pull embroidery thread taught.
Repeat this process 5 more times.


At this stage, the embroidery floss should still be attached to the flower base and it should also be coming out from the center top.


Thread a button onto the embroidery floss and sew it to the middle of the flower center. Tie off with a secure knot to the back of the flower center.


Gather all components together.


With hot glue, attach the flower center to the center front of the ring of petals.


Turn the flower over with it's back facing up. Apply a puddle of hot glue into the center hole. This will fill in the center of the ring of petals and also ensure that the flower center will stay firmly attached. Set aside for a couple of minutes to allow the glue to cool and harden.


Glue a 1" piece of felt to cover the mechanics.


Glue on a pin back.


All done!


Have fun with this tutorial!
Aloha!

Monday, January 26, 2009

It's That Time Again

I can't believe that it's that time of the week again. Diet Challenge check in time! Well, I am down 1-1/2 pounds this week. I have lost a total of 5 pounds since starting the challenge 2-1/2 weeks ago. Although my loss isn't as great as last week, I am very satisfied. To reach the goal that was recommended by my doctor, I need to lose another 17-1/2 pounds. It won't be easy, but I know that I can do it!

Here is an easy Sloppy Joe recipe. Who doesn't love Sloppy Joes, right? This recipe is only 457 calories per serving and will serve 4.

Easy Italian Sausage Sloppy Joes

2 tsp. olive oil
1 chopped bell pepper
2 cloves of garlic, minced
1 lb. lean Italian hot or sweet turkey sausage
1 cup prepared spaghetti sauce
1 tsp. dried basil
4 (8-inch)toasted French bread rolls
1/2 cup shredded mozzarella

Heat oil over medium heat. Add bell pepper and garlic, cook 3 minutes. Remove sausage casings and crumble; add to skillet. Cook until no longer pink. Add spaghetti sauce and basil and cook about 10 minutes or until thickened. Spoon on top of rolls and top with cheese. Enjoy!

On an entirely different subject...Remember when I told you how much I love makeup? Well, I recently got this bright idea of mixing up my own mica powders to create mineral eyeshadows since I love mineral makeup in general. I had been reading about how to do it online and had also viewed several clips on YouTube about it. Well, I've had my supplies for over a month now (ordered it from TKB Trading) and I still haven't tried it yet.

I purchased a ton of little jars with sifters (well, not a ton but 500) with high hopes of mixing up every conceivable color imaginable. Possibly a little over ambitious, eh?


I also purchased their Matte Texture Base. This is a blend of natural ingredients that the company put together for the purpose of making eyeshadow. Since it is already mixed for me, I just need to add it to the mica's to create the eyeshadow.


I ordered a total of 100 mica powders. The color's are all so beautiful. The mica's can be combined to create any color that you can think of.


I know, who needs 500 eyeshadows, right? Well, maybe I don't NEED it but I surely WANT it. LOL Now I just have to find the time to sit down and do it. I'm sure it will be loads of fun. At least that's what I keep telling myself anyway.

Take care!

Aloha!