To create this reversible pincushion, you will need 3 coordinating pieces of fabric cut to the following sizes:
*Two 6" x 6" pieces of fabric which will be used for the body of the pincushion, one for the top and the other piece for the bottom.
*One 21" x 2" piece for the decorative band
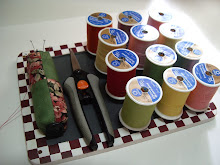
You will also need the following embellishments:
*21" piece of medium rick rack
*2 buttons
*8 to 12" of embroidery floss

For the decorative band:
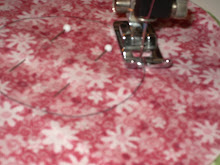
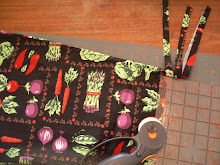
With right side facing up, place rick rack onto the 21" edge of the decorative band, slightly less than 1/2" from raw edge as indicated by the ruler. Pin in place.
**Please note that if your rick rack should be larger or smaller, you will need to adjust this measurement so that the rick rack will be centered on the decorative band after sewing.

Machine stitch rick rack into place.

Pin right sides together along the 21" edge. Sew together using a 1/4" seam.

Trim the seam to 1/8" and turn it right side out. Iron flat. Cut the decorative band into 4 equal pieces.

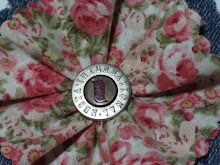
Place one of the 6" x 6" pieces onto a flat surface, right side facing up. Mark the center at the outside edge with a pin. Repeat on all sides.

Pin the 4 pieces of decorative band to the 6" square, each one meeting at the center mark.

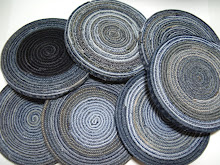
With sewing machine, baste the ends of the decorative band 1/8" in from the raw edge. Trim the ends of the decorative band to meet the raw edges of the 6" x 6" piece.

This is a close-up of the basting. This will hold the small pieces in place and keep them from shifting.

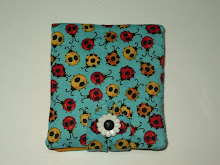
Place both 6" pieces right sides together.

Pin in place and sew a 1/4" seam along all 4 sides, leaving a 1-1/4" opening for turning. Clip corners and turn right side out.

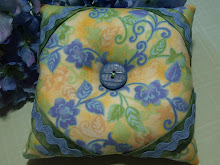
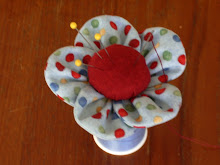
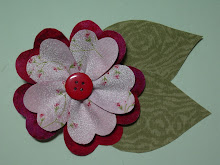
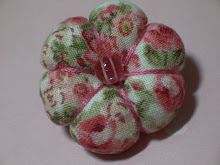
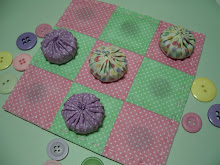
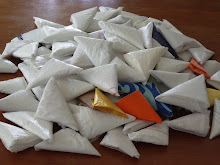
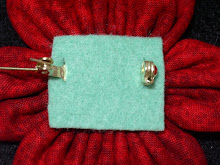
Add the pincushion stuffing of your choice. Sew the opening closed using a ladder stitch. Tuft the center using embroidery thread, and add decorative buttons to both sides of the pincushion.

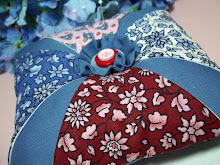
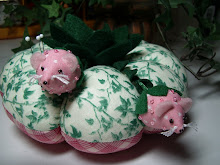
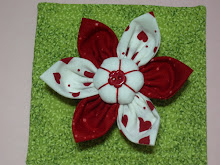
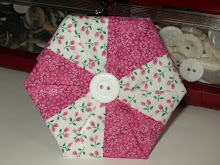
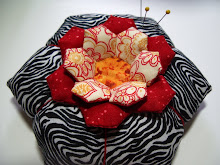
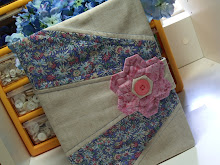
Now for the reversible part of this pincushion...Put your fingers through the decorative bands and pull it to the opposite side. This will give a fresh new look to your pincushion.
There you have it. Two pincushions in one!

Enjoy!
Aloha!


27 comments:
What a great idea -- thanks for the tutorial!
You do such beautiful work and are soooo talented. Love the pin cushion, Thanks for thinking of us
Yes, Lettie - thank you for the project. I always enjoy items that have a use. Now, if I could just be where you are at! lol from the usa
Another great idea, thanks for the tutorial ! I will try very soon. Kiss from France
Dear Lettie,queen of pincushind and duchess of the needles and pins,these is such a sweet idea, I may try that when I got some tíme).
I started to work again on monday (after 7 weeks of for recovery)and my desk is coverd with urgent-to-do things.
But I will keep that pincushin in mind.
All the best my friend
Janine
This is so lovely. Thanks for sharing. Have to try ..
This is fantastic! Thank you for tutorial!!!
Clever as always! Both sides are so nice it would be hard to choose!
Cute, cute, cute!!!! I love the pin cushion. Thanks for sharing the instructions. I have been wanting to craft for so long, but I can't seem to find the energy.
Have a great day.
So clever, as usual! This would make such a sweet gift.
This is too cute I've got to give it a try. Thank you.
Sharon
Very cute!!!
I definitely will have to make one ( or 2) :-))
Liz
It is lovely!
Wow, cool, thanks for sharing.
HOLA!!!ES UN PRECIOSO ALFILETERO, TENGO QUE PONERLO EN PRACTICA, MUCHAS GRACIAS POR LA IDEA.
SALUDOS ODETTE
The pincushion is so cute! Such pretty colors - blue and green. Thanks.
Very clever, Lettie. I'll have to put this on my "to do" list. :-)
How cute and clever. Great instructions. Love it!
What a great pincushion and another wonderful tutorial! Copied and put it my tutorial folder!
Very pretty! Michelle
This is one of the cutest pincushions I have seen! Thank you for the tutorial.
Hello. Just checking out new blogs and I really like yours. Feel free to come check out mine.
Very cute Arlette.
You are so creative! I love to see all your projects:)
Olá! Conheci o seu cantinho e é tão lindo! Lindo e criativo!... Amei mesmo!!! Parabéns pelo seu trabalho! Se puder, dê uma espiadinha no meu:
magiadaines.blogspot.com
Beijinhos do Brasil.
My goodness! I just can't over how creative you are. Love it.
There are lots of nice pincushions out there. And then there are those that stand out and really catch your eye, which is what your pincushion does. It's just lovely. Thanks for sharing.
Post a Comment